Homemade Onigiri Recipes for Japanese Rice Balls
Onigiri are delightful Japaneses rice balls or various flavours usually wrapped in nori. They are just perfect as an entree or a quick snack. They are made from boiled or steamed rice and can be served hot or cold. The key is the rice. Koshihikari rice provides the best texture, tough a good quality sushi rice can also be used. You can use a fantastic range of flavors and seasonings. See the guide below for how to make them and the array of fabulous recipes to try.
Guide to Making Onigiri at Home with Three Ingredients
Rice Type and Preparation - Koshihikari rice is recommended for the best texture. Cook it as you do for sushi rice on the stove, using the classic absorption method, or using a rice cooker,
Seasoning Furikake - This type of Japanese seasoning is traditionally sprinkled over cooked rice in a bowl. It’s made from a blend of ingredients including various spices, sesame seeds, seaweed, dried bonito flakes, egg, salt and sugar. You can buy prepared versions of make your own.
Seaweed Wrapper Nori - This is the flat wrapper is commonly used to wrap sushi and is widely available at supermarkets and Asian grocery stores. It’s not absolutely necessary, but does make it easier to pick up and hold your homemade onigiri.
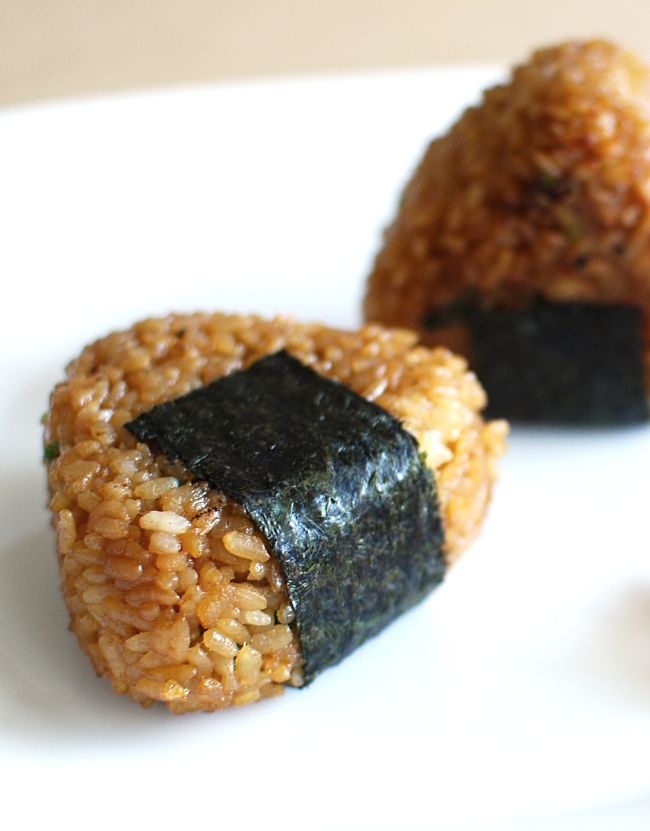
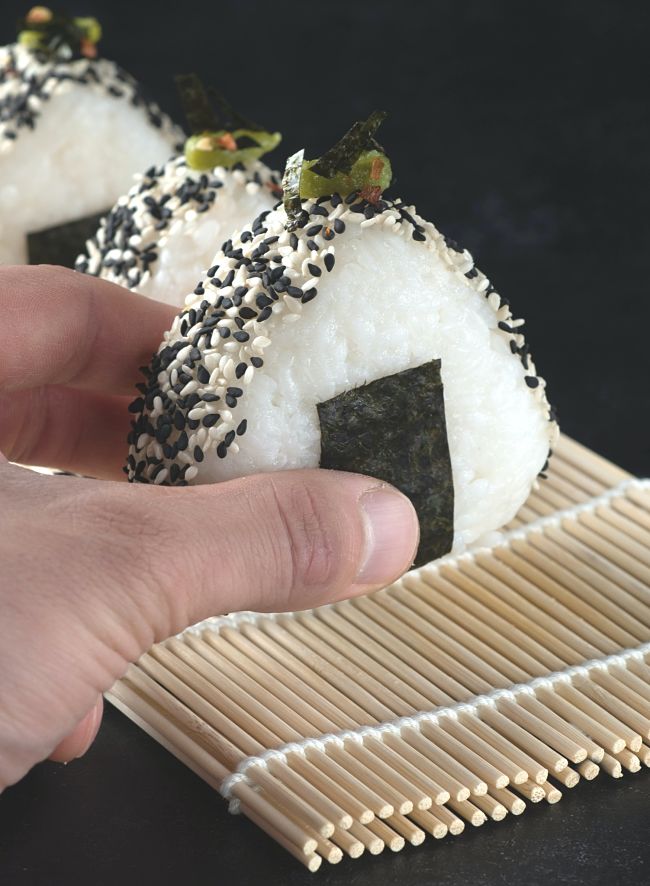
Preparing the Rice Balls - Transfer your freshly cooked rice into a large mixing bowl. Sprinkle the furikake flavouring over the rice and mix well. Wet your hands with a little water. Sprinkle a pinch of salt on each hand and rub your hands together. Then take small half-hand fulls of rice and roll into a tight ball. Make a small indentation in each ball and add add about a teaspoon of filling, covering over with rice to hide it inside. Otherwise, the filling can be added as a topping. Squeeze the rice into a triangular shape using your fingertips, while resting the rice ball on the palm of your hand. Then, place a piece of nori wrapper, cut to the right size, on the bottom of the onigiri. Ensure that the rough side of the nori faces inward towards the rice. Next, fold the outside pieces up towards to the top-center of the onigiri.
Suggestions for Filling and Seasoning Options
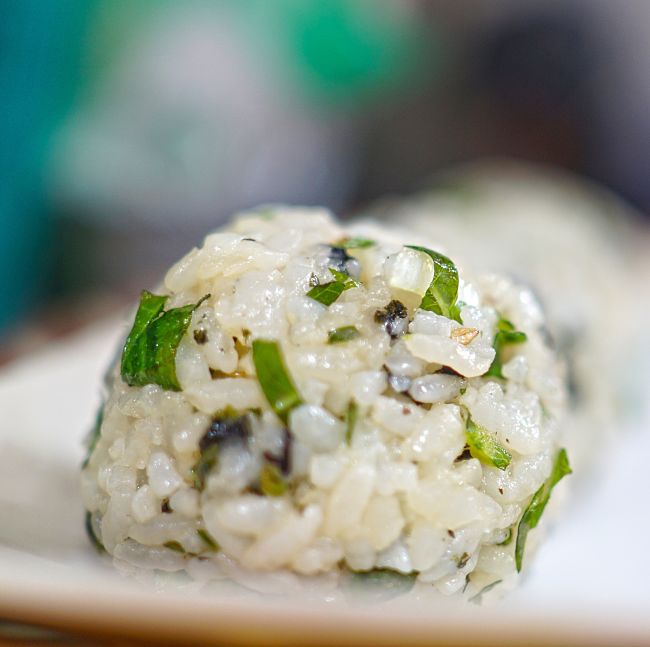
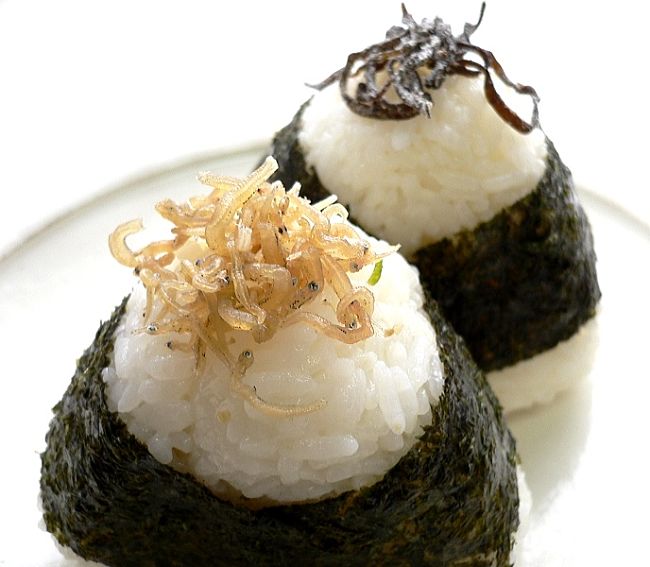
- Simmered kombu seaweed
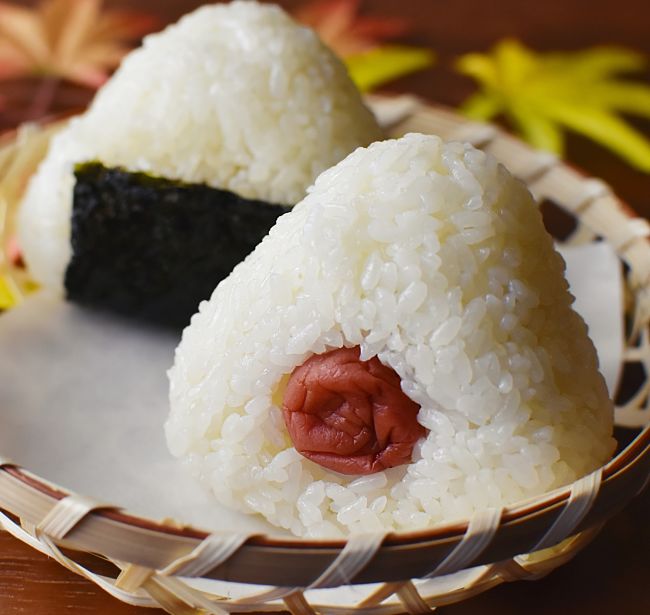
- Pickled plum (umeboshi)
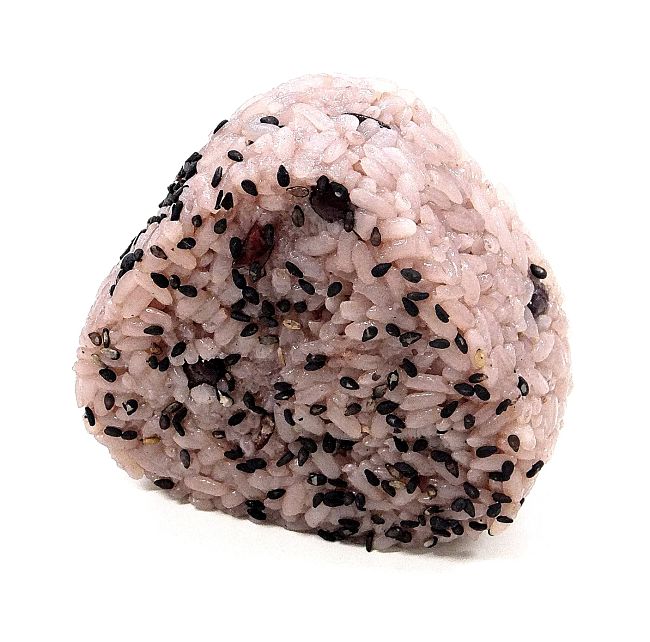
- Goma Shio – black sesame salt
- Shredded chicken and mayonnaise
- Ume Goma Shio – plum sesame salt
- Salted salmon roe or salted cod roe
- Katsuo Fumi – bonito flakes with spices and seaweed
- Canned or fresh raw tuna and mayonnaise with chilli
Best Tips for Making Onigiri at Home
- Make your onigiri while the cooked rice is still warm, but not hot. This helps keep the rice grains bonded together and make it easier to form the traditional triangular shapes and balls.
- If you intend to make the onigiri ahead of time do not add the nori, but add the sheets just before serving it. Wrap the rice balls in plastic wrap or place them in a small airtight container before keeping them cold in the refrigerator. Bring to room temperature before serving
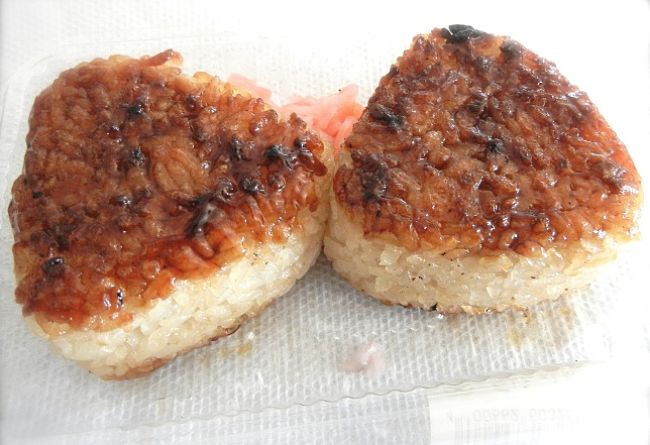
- If the onigiri have dried out somewhat on the outside, you can sprinkle them with water and set aside in a container with a lid. If they are beyond recovery you can cook them as yaki-onigiri, or grilled onigiri. Brush them with a little soy sauce, and then fry them in a pan with sesame oil, or grill them on a suitable griddle.
- You can use various leftovers as fillings, such as cooked chicken, canned or fresh tuna, grilled meat, stir fried vegetables or pickled vegetables
- Instead of triangles, craft the balls into squares, ovals or other creative shapes. Round ball shapes are considered by some to be bad luck as the round ball shape is often reserved for funerals.
Easy Salted Salmon Onigiri Recipe
Ingredients
For Steamed Rice
- 2 1/2 cups water
- 2 cups uncooked Japanese short-grain rice
For Assembling the Onigiri
- seasoned kombu
- okaka (see below)
- tuna mayo (see below)
- 4 sheets nori (seaweed)
- salted salmon (see below)
- kosher/sea salt (to taste)
- 3 umeboshi (Japanese pickled plums)
- toasted white and black sesame seeds (to garnish)
For Salted Salmon
- 1 fillet salmon
- sea or kosher salt
For the Okaka
- 2 tablespoons soy sauce
- 2/3 cup Katsuobushi (dried bonito flakes)
For the Tuna Mayo
- 1/2 tablespoon soy sauce
- 1 can of tuna (2.5 oz, 70 g)
- 2 tablespoons Japanese mayonnaise
Method
Cook the rice using the absorption method or in a rice cooker. Prepare the salted salmon by sprinkling kosher salt over both sides of the salmon fillet. Bake at 425 degrees F (218 degrees C) for 12-22 minutes or until it is well cooked and is easy to flake apart. Next, break the cooked salmon apart into small flakes using a fork and set aside. Next, prepare the Umeboshi filling by placing the umeboshi onto a square sheet of plastic wrap. Fold the sheet in half and carefully squeeze out the seeds from each umeboshi, discarding the seeds, and set the flesh aside. Next prepare the Okaka filling by placing the katsuobushi (dried bonito flakes) into a small bowl and sprinkling with two tablespoons of soy sauce. Stir to combine well. The Katsuobushi should be just moistened in the soy sauce, but not too drenched. Next make the tuna mayo filling by placing the drained canned or fresh tuna into a bowl. Add half a tablespoon of soy sauce and two tablespoons of Japanese mayonnaise, and combine well.
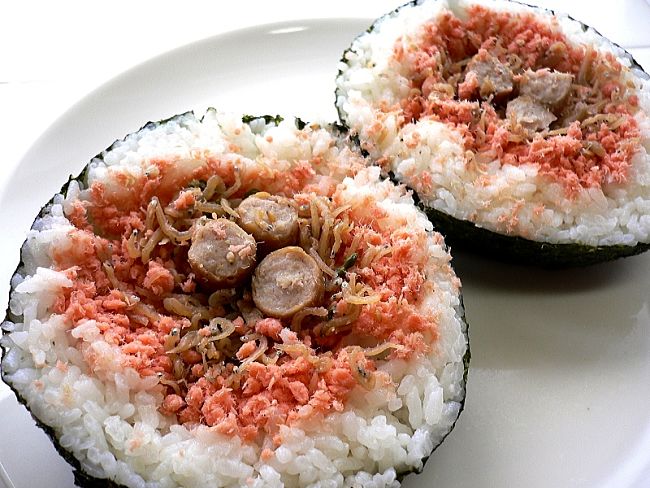
Prepare the Onigiri by firstly cutting the nori sheets into three pieces. Next, wet your hands and rub with a little salt. Then, scoop out a handful of warm rice (about a third of a cup). Shape it into a ball and place it into the palm of one hand. Create a small indentation in the center of the each rice ball. Put about 1/2 teaspoon of one type of filling into each cavity, covering it over with rice. Work the rice ball to ensure even consistency and then gently shape it into a triangle. Then, wrap the onigiri with a nori seaweed sheet. Place a small dab of each filling on top of onigiri after it is finished so your guests will know which kind of nori it is. Serve immediately as Onigiri do not store well in the refrigerator.
Classic Filled Rice Balls Recipe (Onigiri)
Ingredients
- 4 nori sheets
- 3 cups short-grain sushi rice
- 1 tablespoon white miso paste
- 3 spring onions, finely chopped
- 1/2 teaspoons Japanese sesame oil
- 100 g (3.3 oz) canned tuna in brine, drained
- 1 mentaiko (salted chilli Alaskan pollack roe)
- ground red shiso (yukari), to serve (optional)
- 3 teaspoons Japanese or good-quality mayonnaise
- 1/3 teaspoon ichimi togarashi, plus extra, to sprinkle
Method
Wash the rice and cook in a rice cooker or using the absorption method. Set aside to cool. Combine the ichimi togarashi, sesame oil, onions, miso, tuna and mayonnaise in a small bowl. Wait until the rice has cooled enough to handle with your hands. Then, divide the rice into 16 portions. Using wet hands, sprinkled with a little salt, shape each portion into a ball. Using a finger, make a deep impression in the centre of each ball. Fill the cavity of 8 balls with the tuna mixture, seal over with rice and shape each ball into a triangle. Cut the mentaiko into 8 slices and place a serving into cavities in the remaining balls. Seal over and shape into triangles.
Just before serving, slice the nori sheets lengthays to make into 3 strips. Stand one onigiri triangle in the centre of each strip. Lift both ends of the strip and press gently into the rice to secure the nori in place. Serve immediately, sprinkled with ground red shiso and extra ichimi togarashi.